It’s week four of the $100 Room Challenge, and I’m still painting!
Oh, so much painting…

The $100 Room Challenge is having it’s five year anniversary this month. This little budget-stretching project is hosted by the lovely Erin of Lemons, Lavender, and Laundry. The rules are pretty simple- one room, one month, and all for $100 or less. Fun, right?
Check out all the posts at the bottom from the other 20+ bloggers also taking part in the $100 Room Challenge. There are some pretty inspiring projects to be found for sure. Lots of bathrooms, laundry rooms, entryways, and a bedroom, a shed, and a back yard space too. Proving that $100 can make a difference in any space.
Clean and Paint, and Clean and Paint, and…

Let’s just jump right into this week’s projects that we were able to tackle- all the while having a two-day garage sale too! Crazy? Maybe. But let’s just see what we were able to do.
One project that I wasn’t sure if I was going to tackle was painting the back screen door. But after I finished painting the back door black last week- the screen door was looking a little sad. A good clean, a quick prep, and one coat of paint was all it took it to freshen it up.
I forgot to take before photo but here it is after with just one coat of Rust-Oleum Oil Rubbed Bronze. I love this color- it’s the perfect brown-black with just a small amount of metallic sparkle. Lovely.

The torn screen needed replacing on the screen door. And since I was taking the door apart to paint it anyway- it was the perfect time to clean and paint the frames for the screen and window to match the rest of the door too. I covered the window with packing paper and green tape to keep it protected from the paint job.

Cleaning and painting the door handles was a given. A couple of quick coats of flat black spray paint was all it took, and they look brand new.
And more paint…

And because this $100 project is all about cleaning and painting… I also painted these two wood crates olive green. They had been white, which was fine. But I have been craving deep moody colors lately- so to the spray paint stash in the garage I went. I had just one can of this dark olive green color leftover from another project- which turned out to be just enough to cover these two wood crates. Such a fun color that will look so good with all the gray, black, and browns being used in the space.
A Quick Door fix

A small project that I have on the $100 Room Challenge list was to cover the inside jagged bottom of the back door. This has been a project I have wanted to do since we moved in 6 years ago! The bottom edge had been damaged and become rough and jagged before we moved in. I don’t know how it was damaged, but with a rental house you sometimes get what you get. For a super quick fix we cut a piece of 1/4″ plywood to fit. Then attached it to the door with two screws. It was so easy and only took a few minutes. I’m not sure why I waited so long to do this.
And even more, painting to be done

In my original plan, I wanted to paint the inside back of this door flat black just as I had done with the front of it. But when I went to do it- I just couldn’t. I felt a little scared and worried that I wouldn’t like it too much. What to do… Change the plan of course!
I still really liked the soft gray-blue color on the door. But it was scuffed and worn and needed a new coat of paint. So I ended up mixing up some leftover paint from the stash to come up with a robin’s egg blue. It is slightly brighter than it was before- but it’s just what this dark stairway needs.
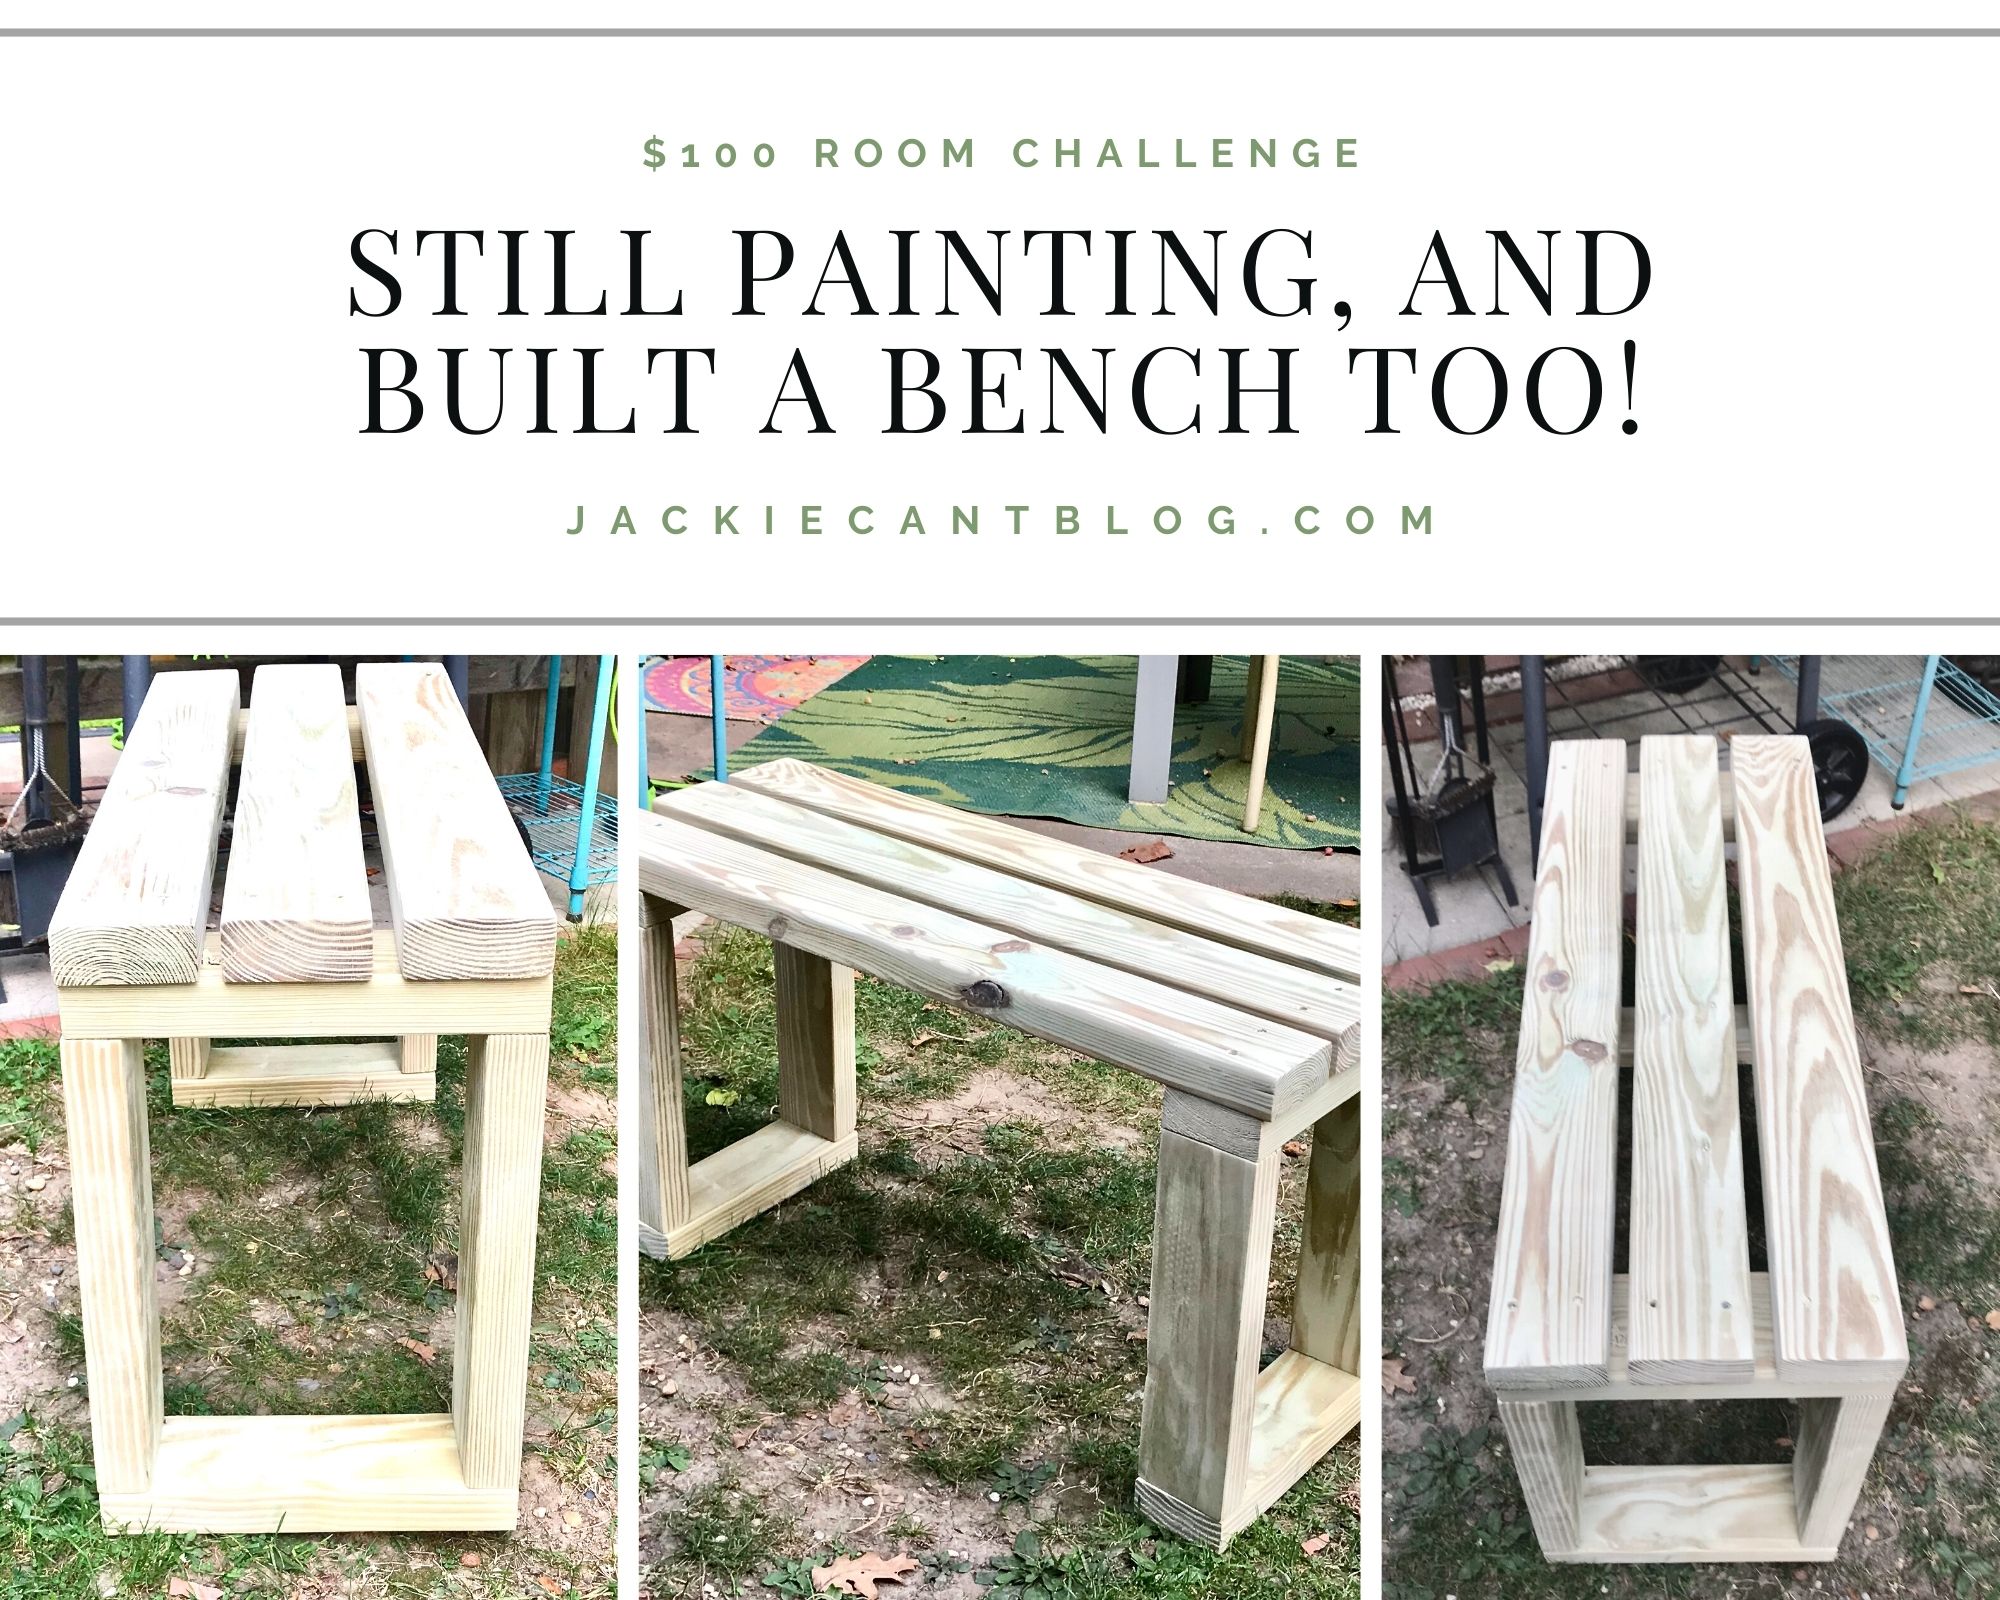
and then We Built this Bench

A project that I knew we could check off the list was a simple 2 x 4 bench. I searched on Pinterest for inspiration and then came up with my own plan.
Check out my Pinterest board- Easy Build Bench

No fancy cuts. No fancy tools. Just 2 x 4s, screws, a measuring tape, a pencil, a miter saw, a drill, a t-square, and a plan. Let’s do this!
To start the bench we cut all the wood and sanded the edges before assembling the bench. The legs are just a simple rectangle, then the three boards for the top were screwed into the legs. It took longer to sand the boards than to screw it all together.

This bench proves that you can just jump right in and get something pretty. We only built one- but we need two! So a tutorial will be coming next month with all the details!
Still Painting and Built a Bench too!

We’re just a couple of days away from the Back Porch Makeover reveal! Want to catch up on all the projects for this $100 Room Challenge click the links below:
- Back Porch Makeover- Week One
- Diggin’ In the Dirt- Week Two
- How to Paint Doors on a Budget- Week Three
Be sure to come back and see how all of these projects came together for less than $100.

Let’s check out all the other blogger’s posts for the $100 Room Challenge
That bench is amazing, and that kickplate looks great! I painted our door this week too!
Thanks so much, Joy! The bench was pretty easy- so glad we did it. Looking forward to seeing everyone’s spaces.