Ready for another fun and easy Holiday Craft?
Let me show you how NOT to make DIY Mercury Glass Ornaments for your holiday tree decorations

Let me first say that I do love how these DIY Mercury Glass Ornaments turned out. They are so pretty and add so much texture to my Christmas tree this year. That said…
I also think that they were kind of a DIY fail since they didn’t turn out how I expected. The color isn’t as bright and reflective as I wanted, and yet they’re so beautiful.
But isn’t that the fun of crafting?
You never really know how it will turn out- it’s always a surprize!
Start at Pinterest

This year for my Holiday Decorating I am using a mix of metals and natural wood textures. My go to colors are Black, Cream, Gold, Copper, Silver, and Brown mixed with light blond raw wood tones.
I have always loved Mercury Glass. It is vintage and modern all at once. Mercury Glass can come in a combination of metal colors. It can also be expensive- costing $5 to $10 per ornament.
What’s a budget crafting loving gal to do? Make them myself of course!

Looking at Pinterest I found a few different ways that other crafters have made their own DIY Mercury Glass Ornaments. Most use specialty paint to make the crackled Mercury Glass patterns, one crafter used regular acrylic craft paints and glue for their ornaments.
One feature that I found myself drawn to with the DIY Mercury Glass Ornaments were the ones that were mostly silver with small shiny gold bits and flakes in the pattern. Some crafters use paint or even gold foil.
Let’s see how we can do this project on the cheap.
Simple and affordable Craft Supplies from the Dollar Tree

Of course, all of the DIY Mercury Glass Ornament projects start with a clear ornament- I found mine at the Dollar Tree. They’re plastic and come in a two-pack for $1- that’s a .50 cent starting price for these ornaments.
Not bad at all.
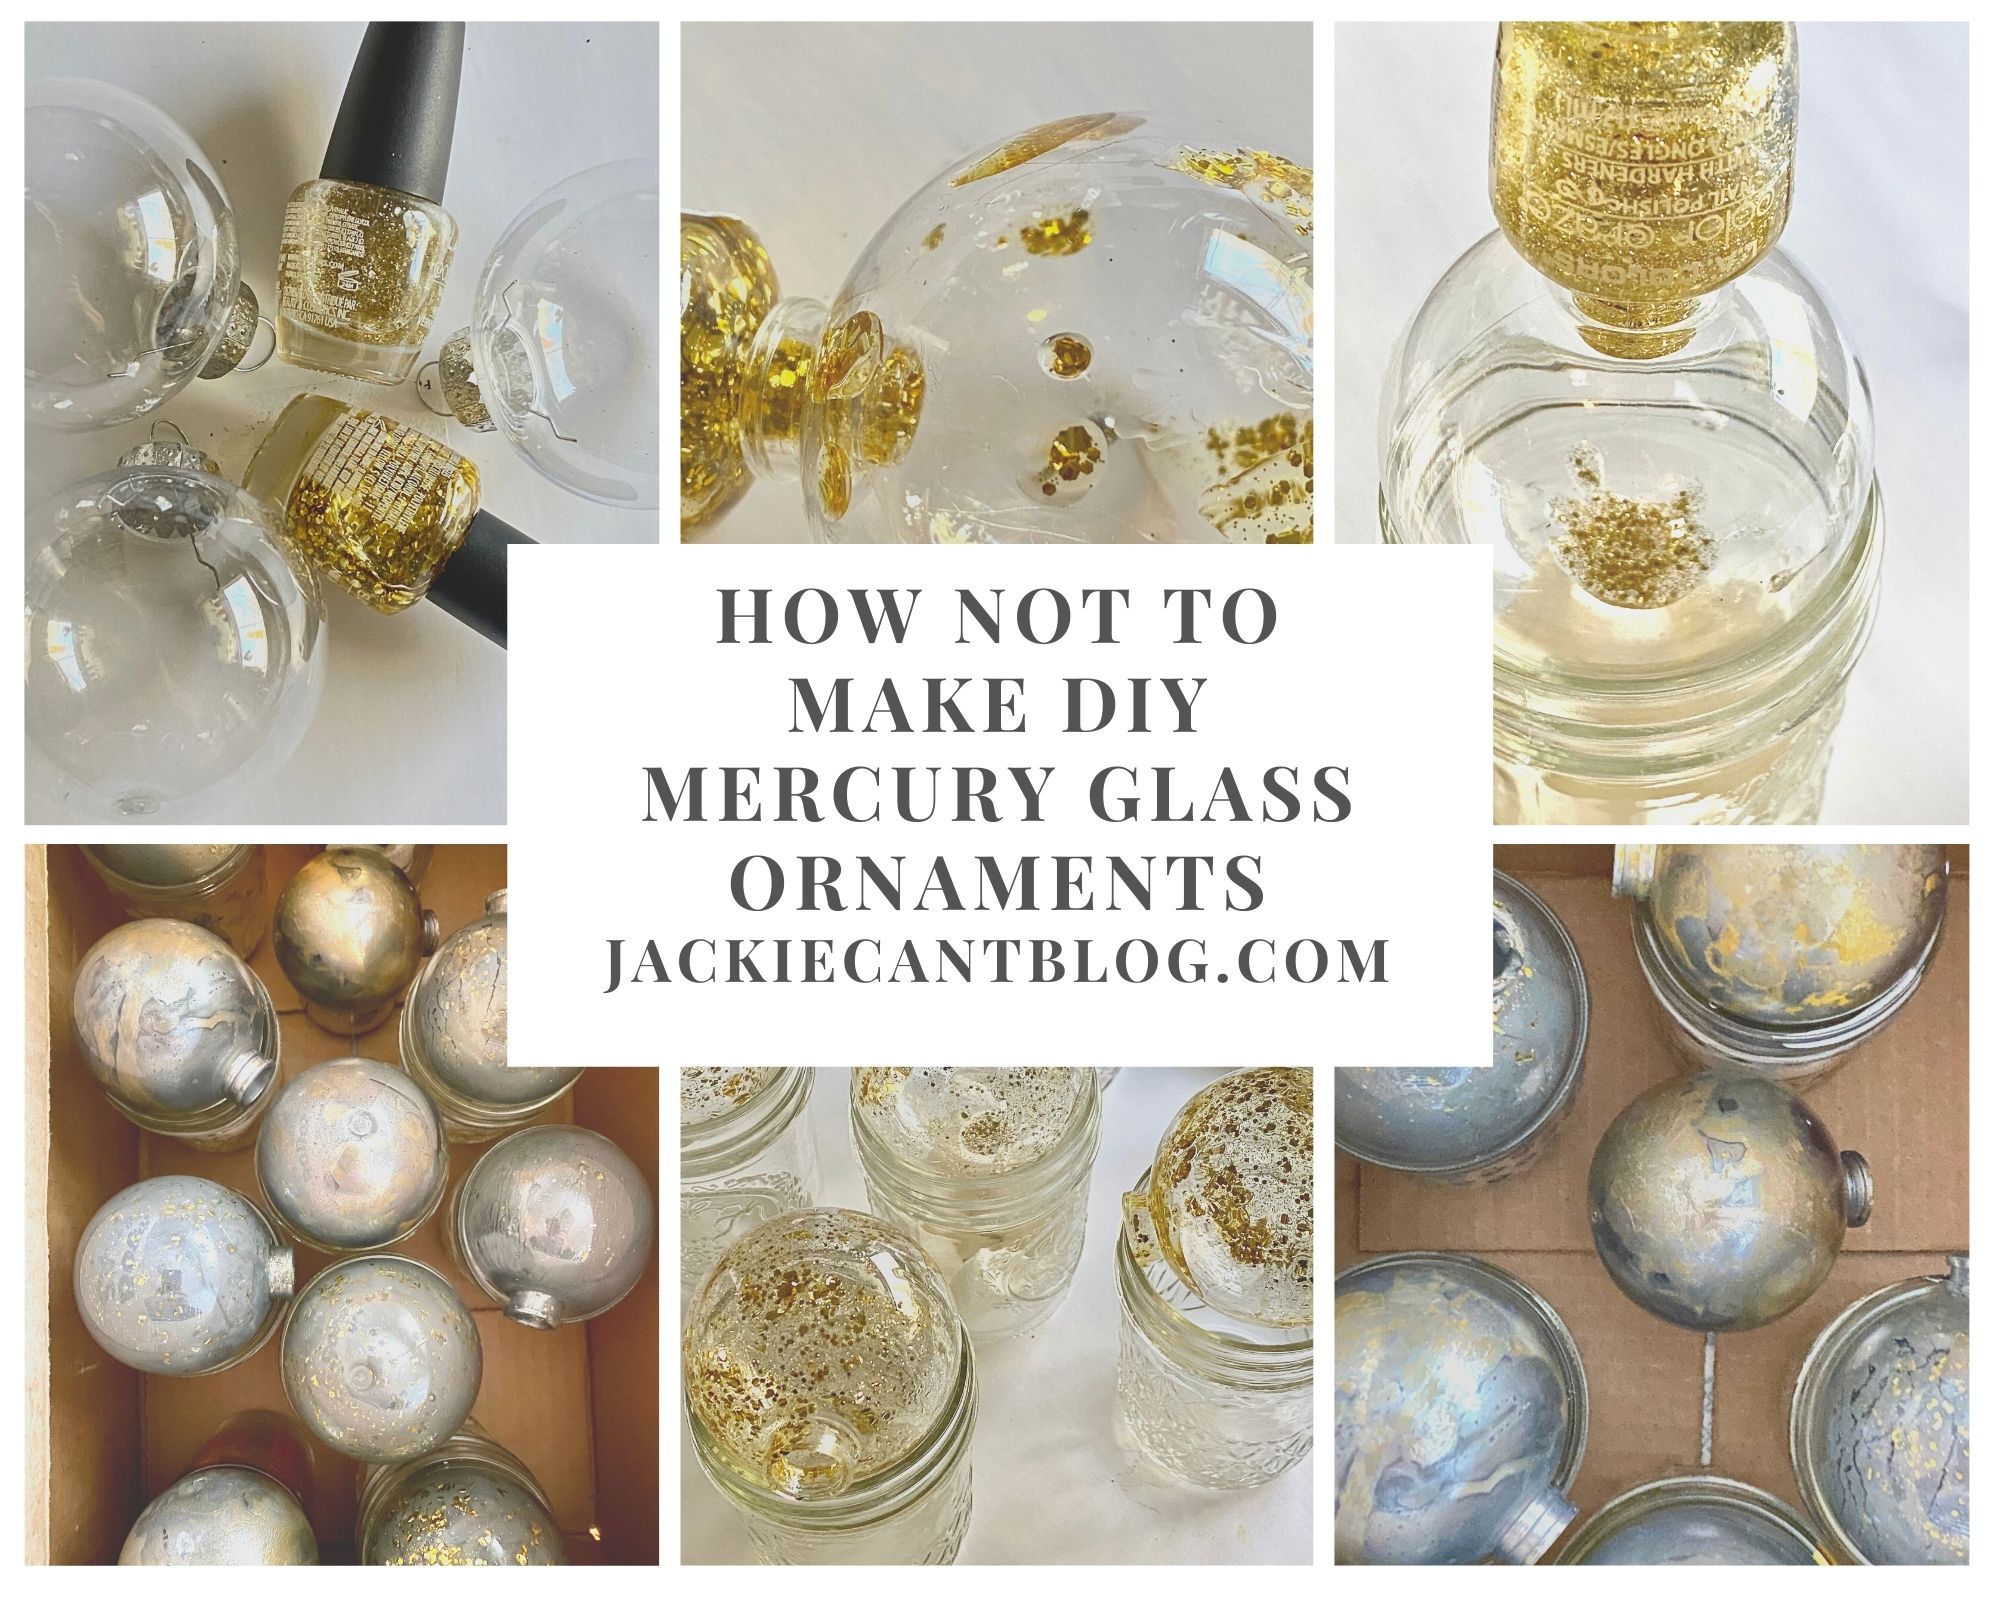
Thinking that I could find an easy way to add that small gold flake- I grabbed some glitter nail polish at the Dollar Tree too. I then simply poured the glitter nail polish straight into the ornaments and swirled it around to coat the inside of the ornament. I got out a few old canning jars to put the ornaments on top and just kept swirling the ornament around until the nail polish was dry.
Spray Paint can be magic! Or not…

Many of the tutorials for DIY Mercury Glass Ornaments used the Krylon Looking Glass spray paint. If you haven’t heard of this product it’s pretty cool- you spray it on the under or back side of glass and it will be reflective as a mirror.
As luck would have it I had a can of this spray Looking Glass paint in my paint stash. But here is also where luck started to fail me- my can is over 6 years old. You can see where I used this can of paint when it was new- to make a mirror from an old window when I first started my blog.
I didn’t realize that this paint had started to go bad at first. I just sprayed the inside of the ornaments and swirled it around to cover over the glitter nail polish. When the paint started drying dark gray instead of a brighter silver that’s when I knew it wasn’t going how I wanted.
But I kept going, layering paint until they were fully covered.
DIY Mercury Glass Ornaments

While I was disappointed with how dark the ornaments were turning out- I was kinda loving the gold, dark gray, and silver contrast.
The large gold flake nail polish is definitely my favorite!
Add more gold, of course!

There were a couple of ornaments that the spray paint didn’t cover completely, so I ended up pouring in a bit of gold paint in for more layers of paint. I think that the glitter, dark gray/ silver, and gold are an amazing mix.
Small and Large Glitter for extra texture

In a few of the ornaments, I mixed small and large gold glitter. I just love all of the texture this mix of glitter sizes adds. It’s the little details, am I right?
Lots of layers of glitter nail polish and paint- who knew that could be so pretty?

I do really love how these pretty DIY Mercury Glass Ornaments turned out. Even if they’re not exactly how I thought they would.
What would I do differently? Buy a new can of Krylon Looking Glass spray paint. I think that a new can would have given me that bright shiny silver color I was going for. Next time for sure!
How NOT to Make DIY Mercury Glass Ornaments
Well, how did I do with the crafting budget?
- Five sets of ornaments from the dollar store- $5
- Three bottles of glitter nail polish from the dollar store- $3
- Old spray paint, and craft paint from the stash- $0
- Total for 10 DIY Mercury Glass Ornaments- $8
- that’s less than $1 apiece. Not bad at all!
Pin this for later

Let me know if you try out my little DIY fail, I would love to see how your project turns out. Maybe yours will turn out better than mine!
Check out my other projects from my Holiday Craft 2020 series
- DIY Painted Bottle Brush Trees
- Boho Ornaments Crafts for your holiday tree
- West Elm Knock Off Nutcrackers
- How NOT to Make DIY Mercury Glass Ornaments
- DIY Anthropologie Dupe Pom Pom Wreath
- 20 Minute DIY- Christmas Bells
