Are you still looking for Holiday Decor ideas? It’s not too late!
I’ve got a quick 20 Minute DIY- Christmas Bells

Let me show you how I took everyday dollar store plastic Christmas Bells and made them look a little bit more heavy and rustic! And just perfect for my holiday decorating this year!
It’s another easy DIY that you can do too!
Dollar Tree Christmas Bells

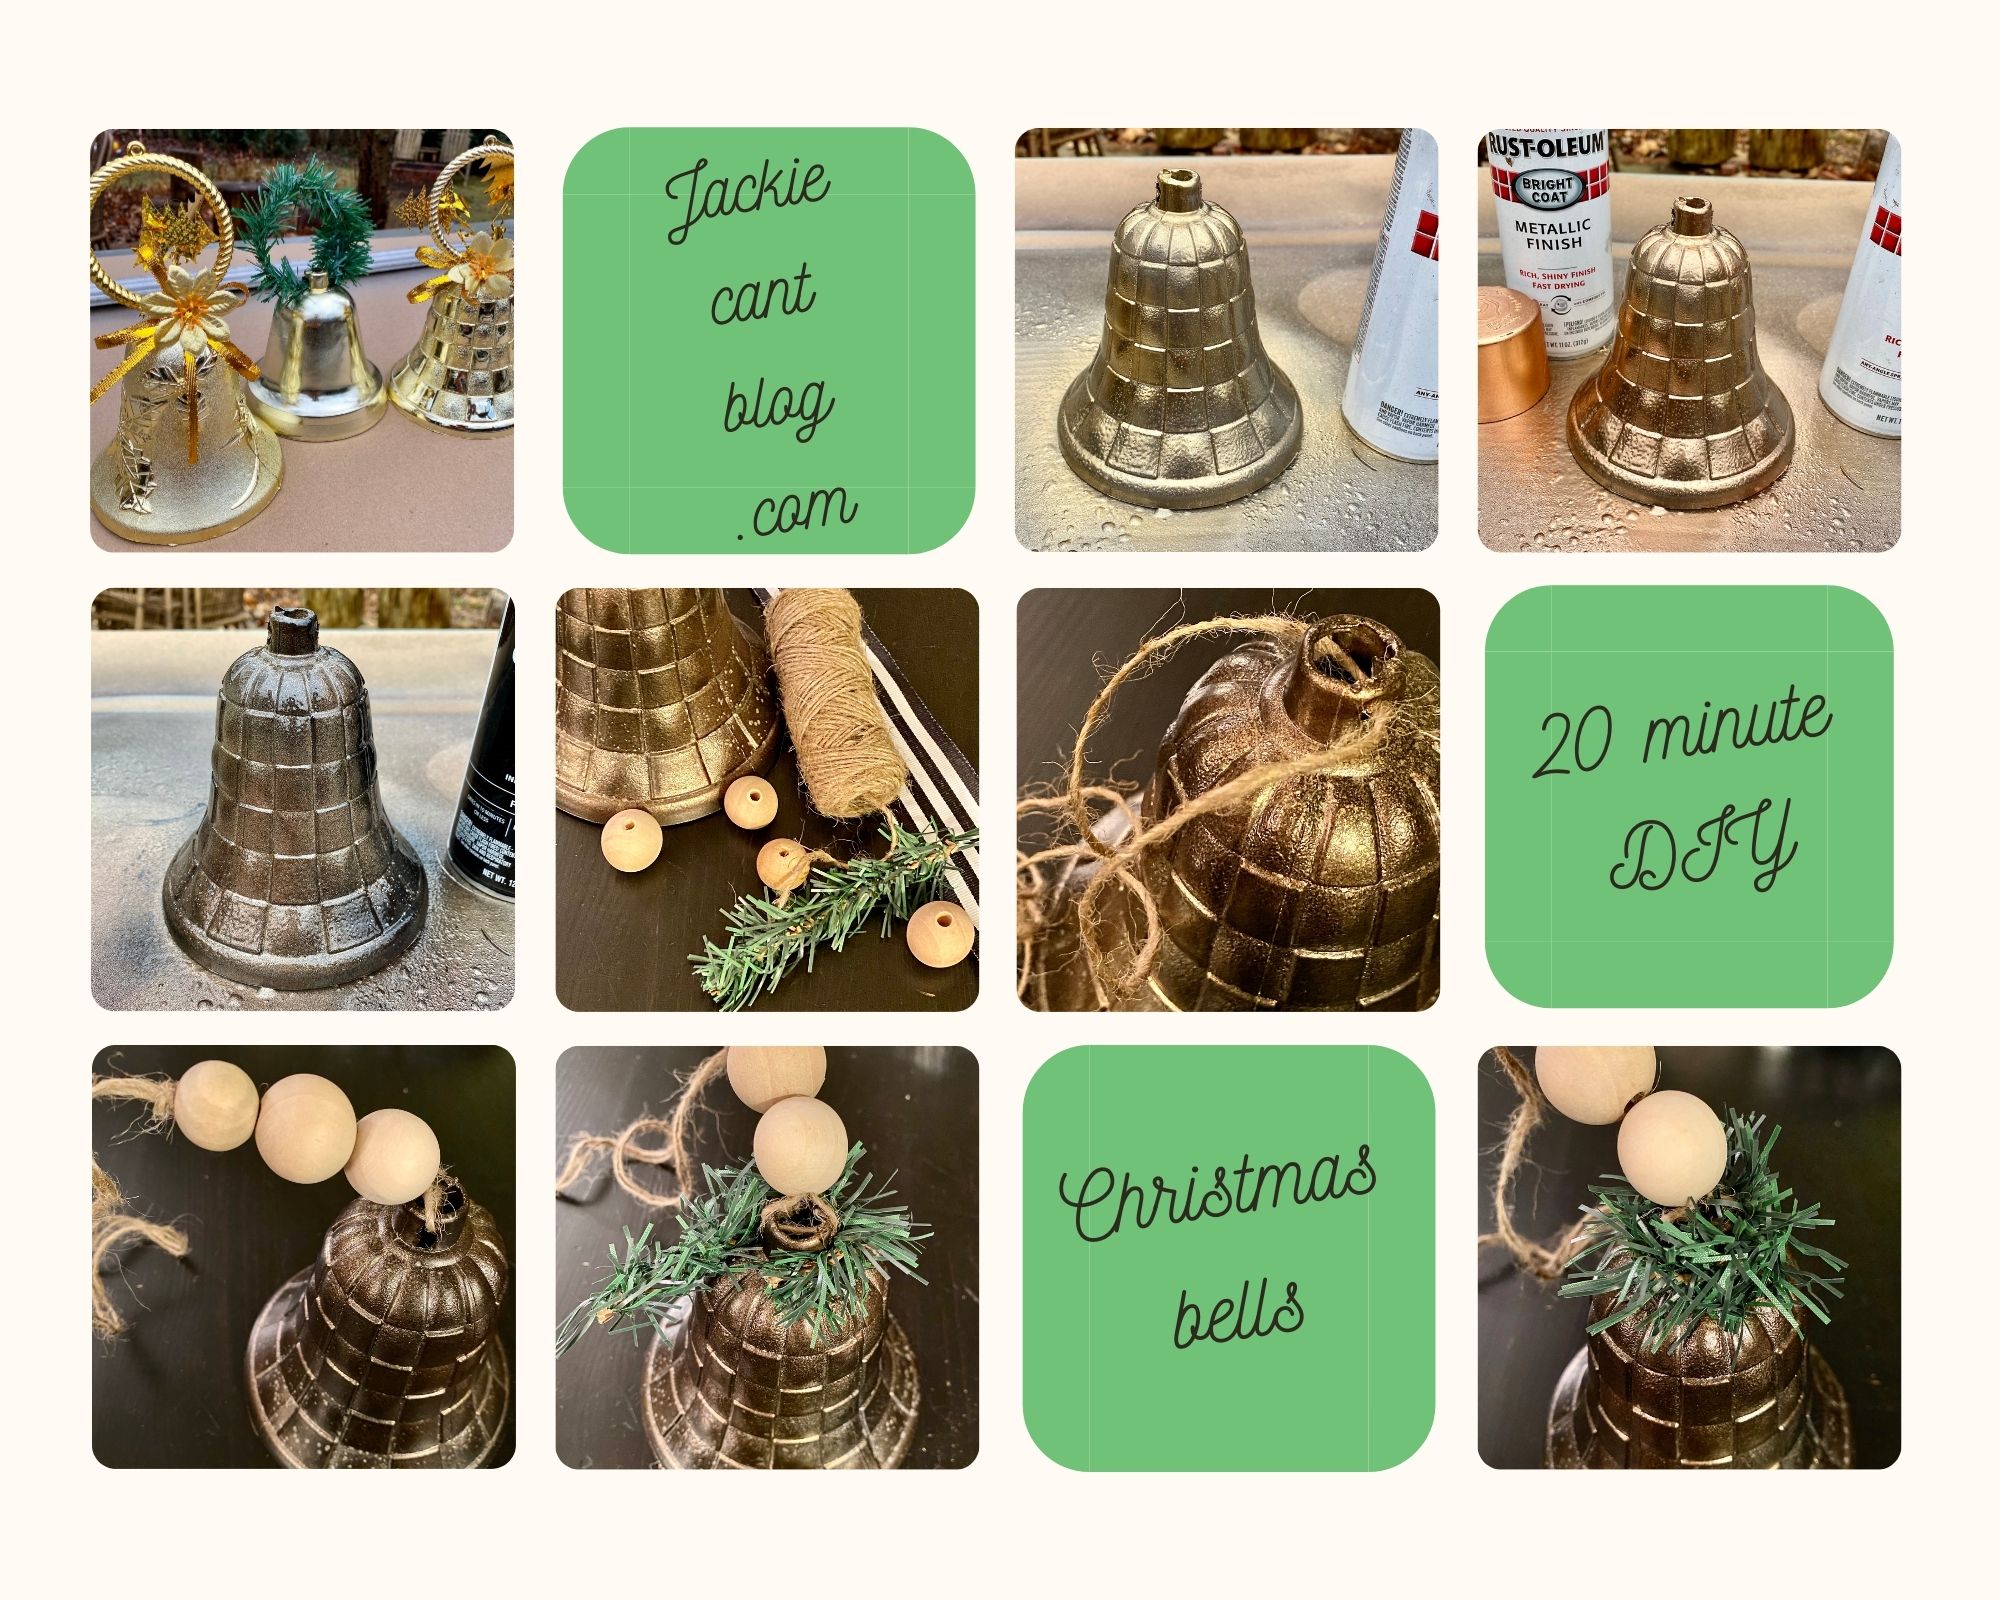
I walked past these bright, shiny and very plastic Christmas Bells at the Dollar Tree so many times. Then inspiration hit! I should spray paint them and make them look more like metal and a lot less like plastic!
Spray Paint is Magic!

Using four different metal spray paints that I had in my stash- I layered the colors to give the Christmas Bells depth and texture.
I used Aluminium, Gold, Copper, and Black metal spray paints.
Keep layering to get your desired look

Using one paint at a time I would give the DIY Christmas Bells a light coat, then use the next color. I didn’t wait for the paint to dry- I just moved onto the next color. Letting the colors mix in together naturally. It gave my DIY Christmas Bells so much weight and texture.
I believe that I gave a full four rounds of layering the paints. This was a quick step to this 20 minute DIY- only took about 5 minutes for the spray painting. The longest part of this project was then waiting 10 minutes for all of the paint to dry.
That means I’ve got five more minutes to get these DIY Christmas Bells together!
Adorn your Christmas Bells

I wanted to have my newly spray painted DIY Christmas Bells to have a natural rustic vibe. Looking to my craft supply stash- I pulled out the twine, wood beads, faux greenery, and a black and white striped ribbon to dress them up.
There’s no wrong way to do this!

Using basic twine and raw wood beads I strung them through the top of my DIY Christmas Bells. This gives my bells something to hang from, and the beads give some real weight.
Add a pop of greenery!

Cutting a small piece of faux greenery I wrapped it around the top of the DIY Christmas Bell for more texture, and a pop of green color.
Add Ribbon, Hang, and You’re done!

I hung my new 20 Minute DIY Christmas Bells on the porch- and I just love how the turned out! My favorite part is that pop of shiny gold that comes from the underside of the bells. It’s such a great contrast to the texture paint treatment I gave the outside.
Save for later on Pinterest

There you have it another quick and easy spray paint project that you can do too! Check out my other projects from my Holiday 2020 Craft series:
- DIY Painted Bottle Brush Trees
- Boho Ornaments Crafts for your holiday tree
- West Elm Knock Off Nutcrackers
- How NOT to make DIY Mercury Glass Ornaments
- DIY Anthropologie Dupe Pom Pom Wreath
Thanks so much for stopping by my little spot here on the internet. I appreciate you being here. Merry Christmas and Happy Holidays!
