A New Year- A New $100 Challenge!
I am so excited to be taking part in a fun blogger challenge for the month of January 2019. It’s the $100 Room Challenge hosted by the lovely Erin of lemonslavenderandlaundry.com What’s the $100 Room Challenge? The rules are simple: One Room. One Month. $100. Just the type of challenge that this budget loving-DIY-crafting-make-do kind of girl loves! Count me in!

Third times a charm
This will be the third time that I will be participating in the $100 Room Challenge. My first round was a year ago January 2018, I completed a refresh on my super tiny Bathroom in our cute rental home. It was a fun project with a few ups and unexpected turns. I am still so happy with how it all came together.
You can see that final reveal here- The Bathroom is Refreshed!

Boy’s Bedroom
For the second $100 Room challenge I completed back in September 2018- I worked on my 22-year-old son’s bedroom. He and I had so fun making a Pinterest board to share ideas and plans. My son was involved with all the decisions, shopping, and details. He still thanks me every now and then for working on his room. I just love how much he loves it that much!
You can see how his room came about in this post- $100 Room Challenge- Reveal week- Part one. I just realized I never posted part two! OOpps! I will try and get that up before the end of this challenge.

Which Room should I do this time around?
After the holidays I always crave a clean blank slate. And with how busy the last few months have been in our household- I have to admit that maybe a full house cleaning was not the priority it should have been. ( Hey now- I am always going to be sharing real life over here 🙃)
One of my goals for the new 2019 year is to spend less money and use more of what I already have. I have always tried to stay within a small budget, but what about a NO SPEND budget? Have you heard of No Spend January? Well- I know this is the $100 Room Challenge. But what if I tried to spend even less than that? What if I tried Not to spend any money at all?
So, my thoughts are to tackle the dining space of our small rental home. A really deep clean, re-think the furniture placement, and a small DIY or two should get this space back to where it should be.

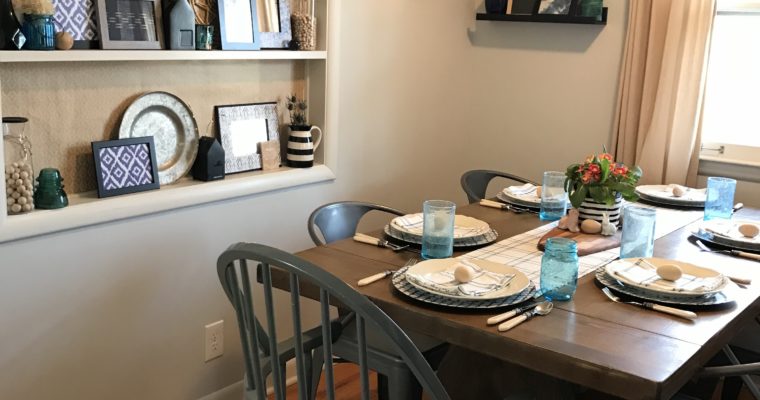
It was a year ago it looked this good
Now, I have to tell ya, my dining room does not look like the photos I am going to share with you now. These are clean room photos. And believe me when I say it is not clean today! It is quite a mess, and the furniture

Where to start?
These curtains. I really do like them- they were in a free pile of a garage sale. They’re a nice neutral tan/ beige color, and did I mention they were free? Anyway- what don’t I like about them? They’re too long. See that puddle on the floor? And even though the color is
Project One: Make new curtains.
I will be using a drop cloth to make curtains to match the ones I have hanging in the front living room window. I really like the color and texture of drop cloth. And I have some extras leftover from another project, but even if I didn’t- drop cloth is an inexpensive item to purchase.

DIY Artwork that anyone can do!
Last year I updated my painted cork board with some scrapbook paper and wood push pins. I layered the papers over the painted cork board and made a fun collage. I really like how it turned out. It was such a simple way for me to update my cork board without painting over it. You can check out how I painted this roadside water damaged cork board this
Project Two: Update DIY artwork with New Scrapbook paper
While I do still love my quilt design painted cork board- I also crave change. An easy project I will tackle is to change out the scrapbook paper collage. I already have the paper on hand- so that will be a zero cost project.

My most loved and hated spot to decorate!
This odd little built in. I love and hate it. I believe that it was once an open shelf area in our cute little rental home. As was with many Mid-century homes in this area of Michigan. The back of this wall is by our front door, but at some
Project Three: update and redecorate the odd built in
I have used wrapping paper in the past to back this odd built in- and I will do so again. The current paper I have used is pretty thin and looks it. While I love the color and texture of this paper- it just isn’t right. I will replace it with some other paper I have used before and have on hand. Using what I already have- another zero cost decorating tip!

Shelves that don’t work!
These shelves. Oh, these shelves. They were up a few years ago, and I took them down when I painted the front room. Then time passed and I forgot why I didn’t put them back up right away. So, I tried again. And now I remember. They’re awkward and not measured out correctly. The space between them is too tight.
Project Four: Takedown OR space out the shelves better
A firm decision has yet to be made here about these shelves. We will have to put in a pin in it for the fate of these shelves. Stay tuned…

Dining Room Plan:
Simple- almost zero cost decorating in four projects:
- Project One: Make new curtains.
- Project Two: Update DIY artwork with New Scrapbook paper
- Project Three: update and redecorate the odd
built in - Project Four: Take down OR space out the shelves better
That’s my $100 Room Challenge plan- four simple and easy updates. With a few extra DIYs for zero to little cost. All in one month.
Be sure and check out what all of my blogger friends are working on for their $100 Room Challenges below. And be sure to come back and see what progress we all make. It’s a New Year and a New $100 Room Challenge!


Oh this is going to turn out so awesome! Love your previous projects. Good luck!
Thanks Jenn! I loved checking out your blog too! This is such a supportive group.
Can’t wait to see what you do in your dining area!
Thanks so much! It is going to be fun. I just have to get through the cleaning part first.
What a great idea! Look forward to seeing how you home shop and refresh this space.
Thanks Kelli! It is a space that has been on my mind to switch up, what better time than now?
That built-in shelf is so fun! I would LOVE decorating that! Anxious to see what you do with this space!
Thanks so much! I really appreciate your support and this challenge.
Wow, I LOVE the idea of no-spend, and your ideas for this space! I can’t wait to see what you do!
Thanks so much Beth! It’s fun trying to get a new look for next to nothing!
This no spend makeover is a great idea! Looking forward to seeing how you refresh this space!
Thanks so much Linda! It’s been pretty great so far, just need to finish up a post to show some progress 😉
Jackie, I love that you’re spending as little as possible on your makeover. I can’t wait to see how it turns out!
Thank you, Rebecca! We all have stuff- its fun to find new ways to use it up!
I love the idea of using what you already have and not spending any money! I love that little built in shelf! Can’t wait to see this come together, Jackie!
Thanks, Ashlee! That built-in is a fun spot for sure!
This space is so super cute! Someone actually did this challenge doing the No-Spend January, and ended up with one of my favorite makeovers, so you can definitely do it! I’m so excited to have you joining in again, and I can’t wait to see what you decide to do!
Thanks Erin! I really love this challenge. The group is so supportive of everyone. And I think that starts with you