I have a super quick and easy DIY craft project today. I love to decorate, and I love to craft. And I love saving some money too. This project has all of that, and I believe that you can do it too! Are you ready to jump in?
Here is what you are going to need for this project:
- a 99 cent shopping bag of your choice
- art canvas
- scissors
- white paper (optional)
- tape (optional)
- stapler

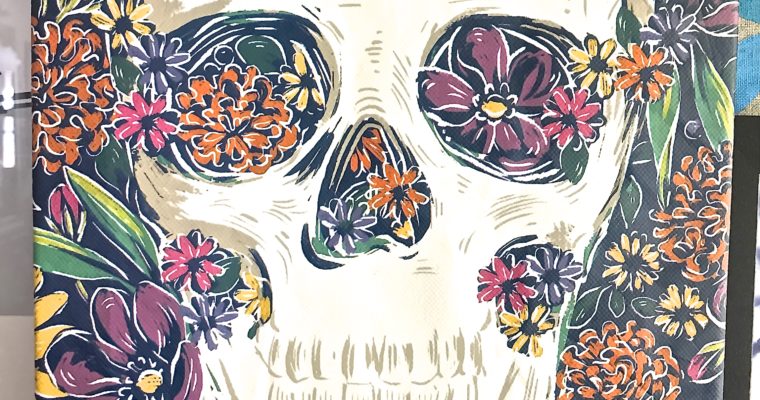
I had gotten this Skull shopping bag at Home Goods a few weeks ago. I love their shopping bags they’re just 99 cents, and they’re always bringing in new patterns. If Skulls are not your thing, thats ok! You can choose a pattern that calls to you!

This is an old art canvas that I had painted 1 inch squares in different colors. It was a craft project that was fun to do. I have used it to decorate, I am a big believer in making your own art. I still like it, but it was just sitting the basement ready for a new life. And it was the perfect size to show the Skull on.
If you don’t have an old canvas, you can find them at any craft store. Or at the thrift store too! I always find canvases for a dollar or two. They have usually been painted by kids, and thats ok. I can paint over with a primer if needed.

The shopping bag is pretty thin, and see through. I could have painted this canvas white to prevent seeing the 1 inch squares. But that would have taken extra time. This was going to be quick, so out came the paper and tape. I used three sheets to get a solid white back to the skull. If you have a white canvas, you can skip this step.

I cut out the front of the shopping bag, removing the sides and handles. I set aside the back of the bag for later. What will I do with it? Not sure, but I have it 😉

At this point I took my canvas, my skull front, and my electric stapler to the kitchen. I wanted to make sure I had a good solid surface for using the stapler. If your stapler isn’t electric, I suggest you get one! I got mine for under $30 and it is the best! It makes projects like this so much faster. I laid down a couple of towels to protect my project and my kitchen counter.

I started at the top of the canvas, putting in staples every couple of inches to secure the shopping bag to the canvas.

Then turning to the bottom, pulling the shopping bag tight with more staples.

After the top and bottom are done, turn your attention to the sides. Securing with staples every couple of inches. When doing the corners, just fold the shopping bag like a present and staple. Then trim any excess shopping bag and discard.

And you’re done! I finished this project in under 20 minutes. That time included collecting all of my supplies for the project. It was pretty easy, and I love how it turned out!

This new Skull art piece is perfect for my Halloween decor. But I have to confess, it may be up a bit longer afterwards too!

What do you think? Are you going to give it a try? I would love to see it! Tag me on Instagram!
-Jackie