I have been working on a couple of projects for our little Bathroom and the $100 Room Challenge. The $100 Room Challenge is hosted by the lovely Erin from lemonslavendarandlaundry.com. In short, using only $100 in one month’s time to transform one room. A creative challenge as well as a budget challenge! How fun!

Working mostly with what I had on hand I wanted to make some DIY Stenciled Artwork.

I had this lovely wooded nature scene painted canvas, that I thrifted from the thrift store for only $1.50. One of the great things about living in a college town is that used canvases end up at the thrift store all the time. And since I have no emotional attachment to the art on the canvas, I can paint over it. In a heartbeat! Especially if it will save me some money. A new canvas can cost a few dollars, and I got this 16 x 20 for $1.50. Score!

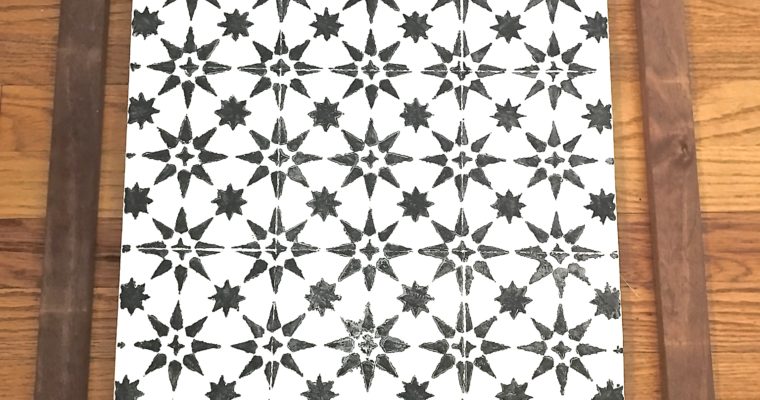
To start my DIY Stenciled Artwork project- I cleaned the surface of the canvas with a vinegar based cleaner, then started to paint over the wooded scene with white paint. It took three coats to cover it completely. I let the white paint dry for a couple of days before going to the next step of stenciling! The fun part 😉 Using clear quilt ruler, I found the center of the canvas and placed the tile stencil. Using a sponge craft brush I dabbed black paint to create the pattern.

Moving and cleaning the stencil every couple of squares, I filled the canvas with the tile like pattern.

What I love about stenciling is that you don’t have to get it perfect. Mistakes all blend in and make up the overall handmade look of the piece. There is a couple of spots where the black paint bled under the stencil. And a couple of other spots where I didn’t dab enough paint to fill in the pattern. But once the whole canvas was filled in, it looked great! Now all my tile artwork needed was a frame to finish it off.

Let us remember we’re on a tight budget for the challenge! So, using some scrap wood from the garage, I cut to size and stained a chestnut brown- I made a frame. I used tiny penny nails to assemble it and attach the frame to the canvas. Trust me ladies, it is just so easy to do!

The simple frame really makes the DIY Stenciled Artwork look expensive! Even though I had everything on hand lets break down how much it might cost to do this from scratch. Just to give an idea if you should choose to do a Stenciled Art piece for yourself.
- 16 x 20″ canvas -$3
- White craft paint- $1.50
- Black craft paint- $1.50
- craft Stencil- $10
- Wood for frame- $3 to $5 depending on the size of wood you choose
- Wood stain- $8 for a quart
- Penny Nails- $3 for a box
All of these are estimates just to give you an idea.

There you have it! A finished DIY Stenciled Artwork, that only cost me a $1.50.
Just a few more days before the full $100 Room Challenge- Bathroom Revel. I hope you came back soon to see where I end up with this fun challenge.