Oh Man, did we get some stuff done this week! It is so Amazing what can happen if the weather is nice!
As I have mentioned before, I am taking part in a blogger challenge- The One Room Challenge.

What is the ORC, you ask? It is a six-week design challenge featuring 20 interior designers and over 200 guest participants. Each one is challenged to makeover one room or space, all collectively posting once a week over at the One Room Challenge website.
You can also see photos from the Participants that are posted on Instagram using the hashtag #oneroomchallenge
For my project I have chosen to work on our outdoor space the Patio. You can see some of my past Patio posts here
Want to see what we’ve done for the One Room Challenge so far?
- Week One- the Plan
- Week Two- DIY Flamingo Pillows
- Week Three- No Progress, just Snow
Here is the Plan and where we stand:
clean up the yard– We filled the compost bin twice!- refresh the mulch for all of the garden beds- We are still waiting for a delivery. Our sweet Landlord is ordering the mulch.
tackle the ugly/ stained concrete slab– I don’t recommend how we did it, but it’s done! 😉build a potting table or bench– We reused a three-shelf table we found for FREE!makeover the found/ free cabinet– Done! It’s not perfect, but it was FREE!- refresh existing patio furniture- clean, stain or paint- Still working on a few things
- refresh or replace existing pillows and furniture cushions- Still working on a couple of things
- refresh or replace existing umbrellas- We have the supplies, just need time to refresh. I am very excited about this project
to rearrange the furniture layout– DONE! And we Love it!!- move/ make a new home for the grill- almost there. A new spot has been decided, just need to rip out some grass. And we’re getting a new grill! Not in the original plan or budget, but it is needed.
makeover the grill? paint legs?– As said above, we have decided to replace!- refresh pots and containers for plants- Still working on this task. 5 pots are in the process of being made over.
- bring in LOTS of plants and succulents- we have bought a few
- add more patio lights- not yet
- add color and texture- still workin’
- do everything for under $300!!!- We are already over this budget by $100, and will end up doubling it for sure! Break down on the budget will be next week, and will include all unexpected purchases and supplies.
Okay, how about some photos?

Here is the FREE by the side of the road hutch we found/had. It had a door that I removed and I started painting before I remembered to take a photo. The purple on the left was a miss-tint can from the hardware store for $3. Not my ideal color, but it is an exterior gloss and will help seal the wood for the hutch to be outdoors.

After I painted the whole hutch, my Man sanded down the purple and stained over it. The feet are made from pallet blocks we had removed from a broken pallet. The one on the left is the solid purple and the one on the right we tested a dark black wash over it. I am still not crazy about the purple, but I haven’t decided what to do about it just yet to change it.

It will sit here in this corner, and looks pretty good with these two chairs. I like the height that it gives the Patio, it makes it feel more like an indoor room. The Chairs still need cushions- trying to decide to use the old ones or sew new, and the styling of the shelves is not finished either.

We found these beautiful succulents and pots at Lowes. They were not in the budget, but I had to have these pots! I love the tile patterns that have that bohemian look I hope to end up with. This is my most liked photo on Instagram to date!

A friend found this little metal shelf or rack- near the dumpster at her apartment complex. She texted me and asked if I wanted it, of course, I said yes! I filled the shelves with my collection of little thrifted metal buckets and small ground cover plants for color. I placed the shelves in this little spot outside the garage side door. Not exactly a space on the Patio, but I have decided that maybe my One Room is my whole backyard space!

I have been working on a few more DIY Mexican Painted Pots. This is a project I do every summer and is pretty simple. You can check out past posts on my painted pots here, and here, and here.
This pot above was painted black, washed with blue, then I used Sharpie Paint pens to draw out the details. It’s a fun project that I did while watching Netflix one night. I love how a little time and paint can take a plastic pot and make it look like more expensive pottery.

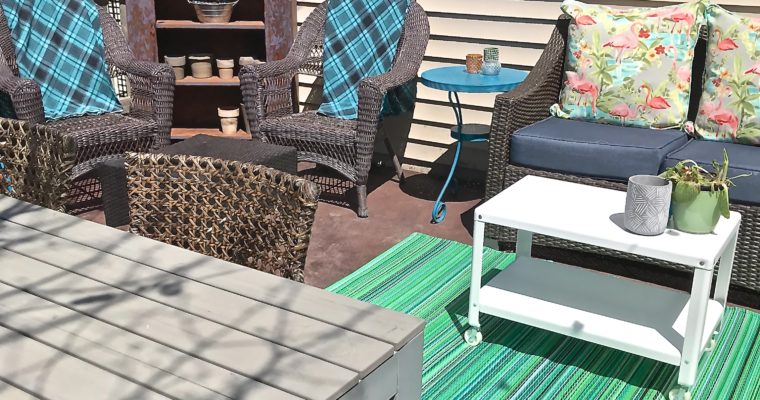
Here is a sneak peek at the new layout of the furniture. We went from being able to seat 8 people to 12 on our Patio. Adding the sofa and a couple of extra chairs (not shown) really helped. We can’t wait for our first get together! Untill then we have had a morning coffee or two out here.

Another project not in our original plan was to find a new home for the fire-pit. We moved it out here to the corner of the yard. Four stone pavers are the start of a base for it to sit on. We plan to add a rectangle red bricks to the pattern to complete the stone square and give it some more interest.

And lastly, my design assistant- Pepe. I had to end my post with a cute puppy. I don’t think I have shown him here before. He has been featured more than once on my Instagram. He loves the new layout of the furniture, but is wondering when I will get the cushions back on the chairs! Me too, Pepe! Me too.

